Easily Create a Hyper-V Windows Server 2016 AD & Nano Server Lab
One of the PowerShell Modules I’ve been working on for the last year is called LabBuilder.The goal of this module is:
To automatically build a multiple machine Hyper-V Lab environment from an XML configuration file and other optional installation scripts.
What this essentially does is allow you to easily build Lab environments using a specification file. All you need to do is provide the Hyper-V environment and the Operating System disk ISO files that will be used to build the lab. This is great for getting a Lab environment spun up for testing or training purposes.
Note: Building a new Lab can take a little while, depending on the number of VM’s in the Lab as well as the number of different Operating Systems used. For example, a Lab with 10 VMs could take an hour or two to spin up, depending on your hardware.
The LabBuilder module comes with a set of sample Labs that you can build “as is” or modify for your own purpose. There are samples for simple one or two machine Labs as well as more complex scenarios such as failover clusters and two tier PKI environments. Plus, if you’re feeling adventurous you can easily create your own LabBuilder configurations from scratch or by modifying an existing LabBuilder configuration.
In this article I’ll show how to use a configuration sample that will build a lab containing the following servers:
- 1 x Windows Server 2016 RTM Domain Controller (with DNS)
- 1 x Windows Server 2016 RTM DHCP Server
- 1 x Windows Server 2016 RTM Certificate Authority Server
- 1 x Windows Server 2016 RTM Edge Node (Routing and Remote Access server)
- 8 x Windows Server 2016 RTM Nano Servers (not yet automatically Domain Joined - but I’m working on it).
This is a great environment for experimenting with both Windows Server 2016 as well as Nano Server.
So, lets get started.
To follow along with this guide your Lab host (the machine that will host your Lab) will need to have the following:
I strongly recommend using Windows 10 Anniversary Edition.
If you are using Windows Server 2012 R2 you will need to install WMF 5.0 or above. Although WMF 4.0 should work, I haven’t tested it.
Running a lot of VMs at once can be fairly taxing on your hardware. For most Sample Lab I’d recommend at least a quad core CPU, 16 GB RAM and a fast SSD with at least 10 GB per VM free (although for Nano Server VMs only 800MB is required).
The amount of disk used is minimized by using differencing disks, but Labs can still get pretty big.
If you’re using Windows 10, see this guide.
If you’re using Windows Server 2012 R2 or Windows Server 2016, you probably already know how to do this, so I won’t cover this here.
In our case this is just a copy of the Windows Server 2016 Evaluation ISO. You can download this ISO from here for free.
You can use non-evaluation ISOs instead if you have access to them, but at the time of writing this the Windows Server 2016 non-evaluation ISO wasn’t yet available on my MSDN subscription.
Most Labs use DSC to configure each VM once it has been provisioned, so the ability to download any required DSC Resources from the PowerShell Gallery is required. Some sample Labs also download MSI packages and other installers that will be deployed to the Lab Virtual Machines during installation - for example RSAT is often installed onto Windows 10 Lab machines automatically.
The first thing you’ll need to do is install the LabBuilder Module. Execute this PowerShell command at an Administrator PowerShell prompt:

Note: If you have an older version of LabBuilder installed**, I’d recommend you update it to at least 0.8.3.1081 because this was the version I was using to write this guide.**
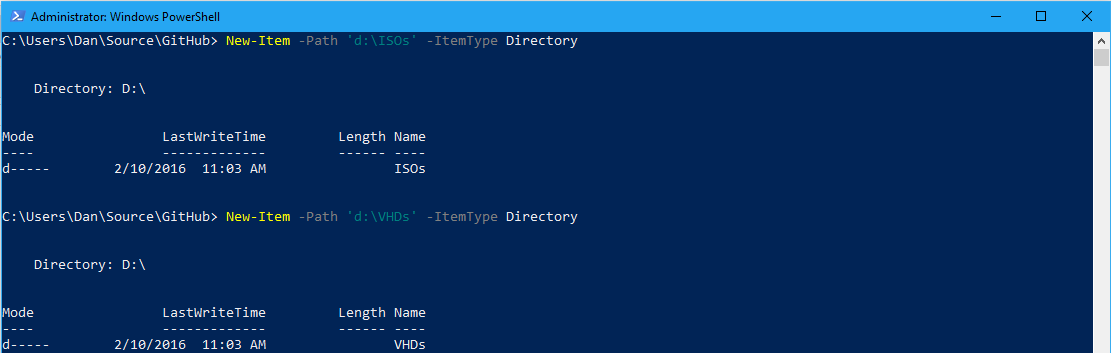
Most labs are built using Windows Install media contained in ISO files. These are converted to VHD files that are then used by one or more Labs. We need a location to store these files.
By default all sample Labs expect these folders to be D:\ISOs and D:\VHDs. If you don’t have a D: Drive on your computer, you’ll need to adjust the LabBuilder configuration file in Step 4.
Execute the following PowerShell commands at an Administrator PowerShell prompt:
When building a Lab with LabBuilder it will create all VMs, VHDs and other related files in a single folder.
For all sample LabBuilder configurations, this folder defaults to a folder in C:\vm. For the sample Lab we’re building in this guide it will install the Lab into c:\vm\NANOTEST.COM. This can be changed by editing the configuration in Step 4.
Note: Make sure you have enough space on your chosen drive to store the Lab. 10GB per VM is a good rough guide to the amount of space required (although it usually works out as a lot less because of the use of differencing disks).
Execute the following PowerShell commands at an Administrator PowerShell prompt:
We’re going to build the Lab using the sample Lab found in the samples folder in the LabBuilder module folder. The sample we’re using is called Sample_WS2016_NanoDomain.xml. I’d suggest editing this file in an editor like Notepad++.
If you changed the paths in Step 2 or Step 3 then you’ll need to change the paths shown in this screenshot:
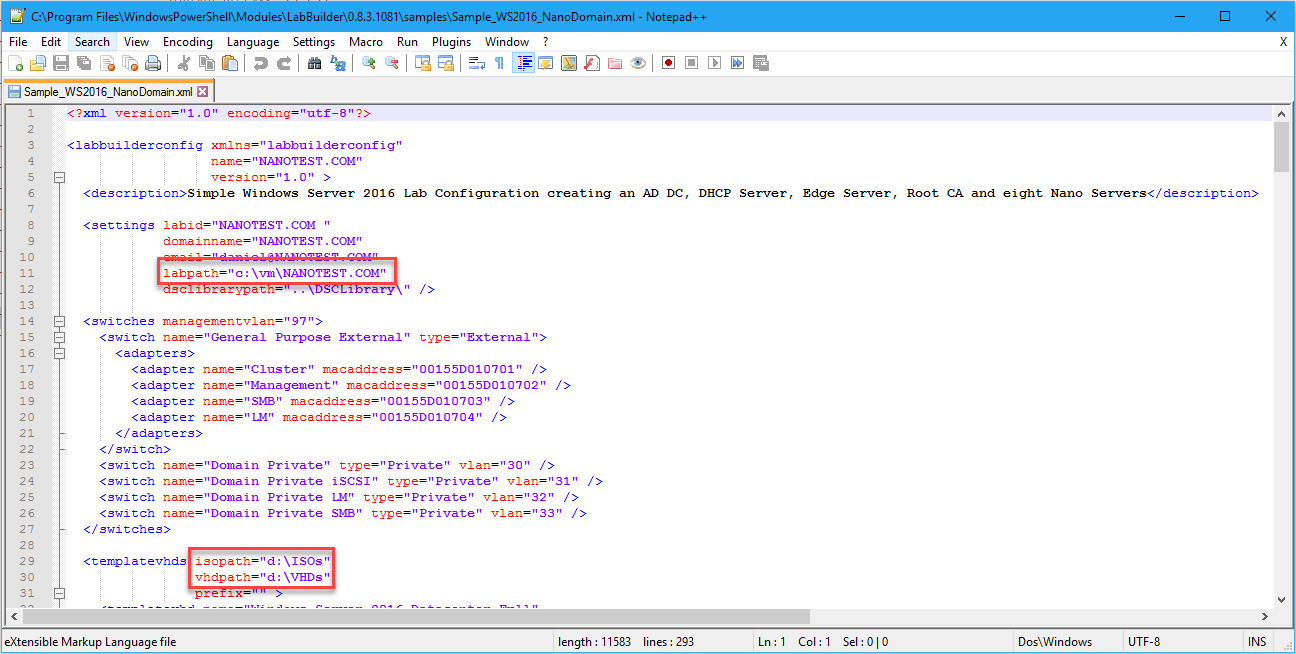
You may also change other items in the Settings section, but be aware that some changes (such as changing the domain name) will also need to be changed elsewhere in the file.
If you already have an External Switch configured in Hyper-V that you’d like to use for this Lab to communicate externally, then you should set the name of the switch here:
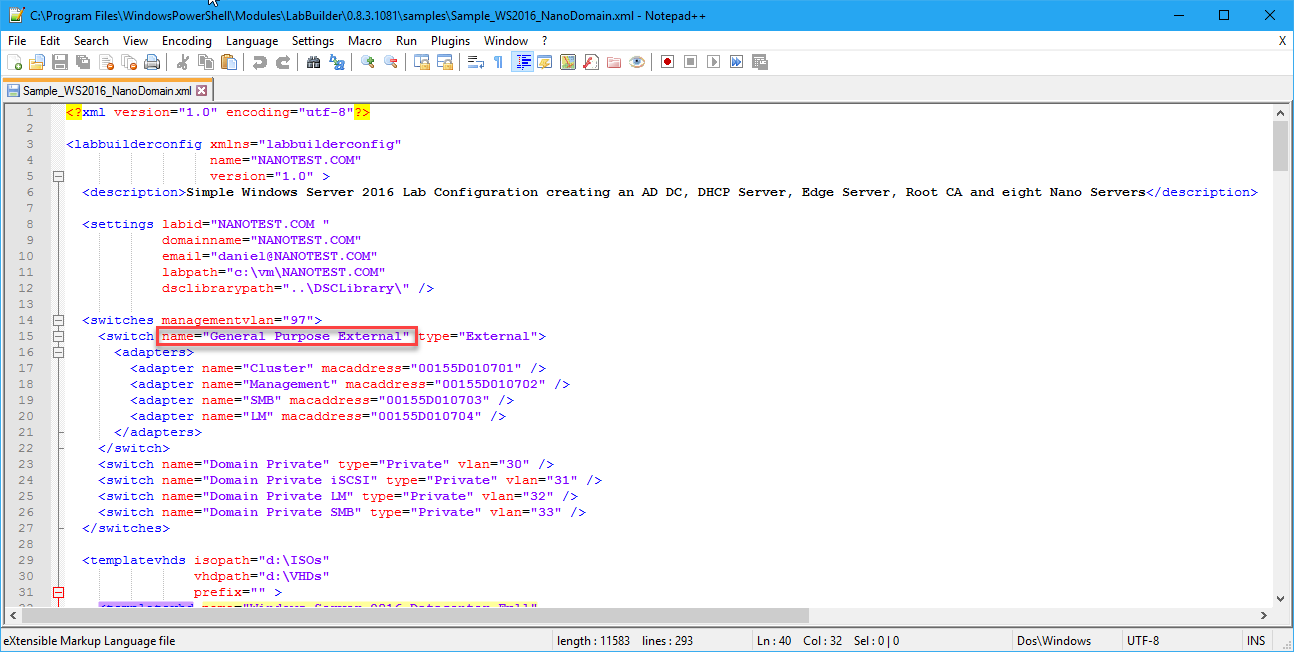
If you don’t already have an External Switch defined in Hyper-V then one called General Purpose External will be created for you. It will use the first Network Adapter (physical or team) that is not already assigned to an External Switch. You can control this behavior in the LabBuilder configuration file but it is beyond the scope of this guide.
Save the Sample_WS2016_NanoDomain.xml once you’ve finished changing it.
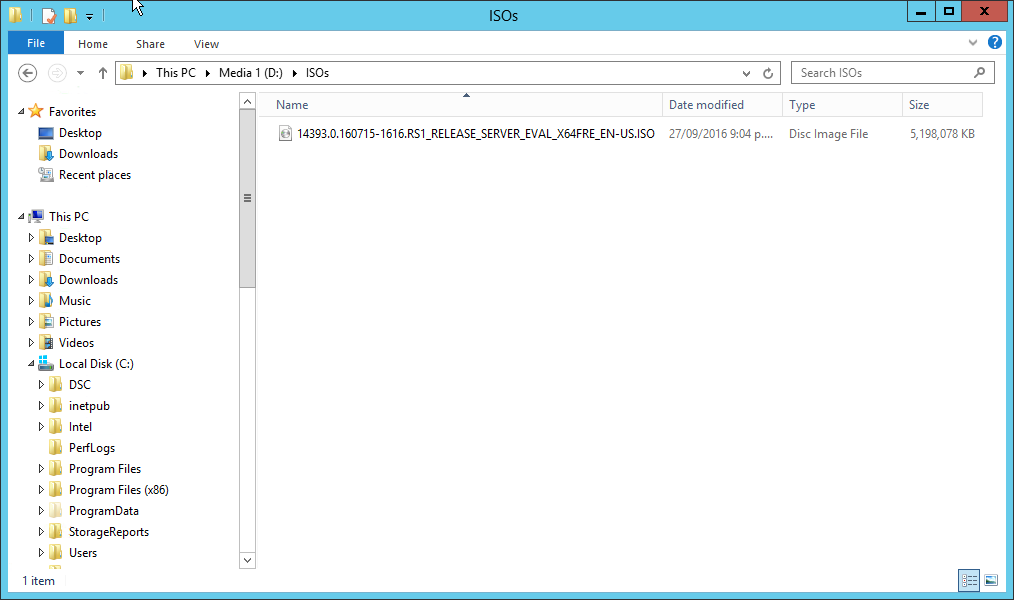
Now that the ISOs folder is ready, you will need to copy the Windows Install media ISO files into it. In this case we need to copy in the ISO for Windows Server 2016 (an evaluation copy can be downloaded from here).
The ISO file must be name:
14393.0.160715-1616.RS1_RELEASE_SERVER_EVAL_X64FRE_EN-US.ISO
If it is named anything else then you will either need to rename it or go back to Step 4 and adjust the sample Lab configuration file.
We’re now ready to build the lab from the sample configuration.
Execute the following PowerShell commands at an Administrator PowerShell prompt:
This will begin the task of building out your Lab. The commands just determine the location of your LabBuilder sample file and then call the Install-Lab cmdlet. I could have specified the path to the sample file manually, and you can if you prefer.
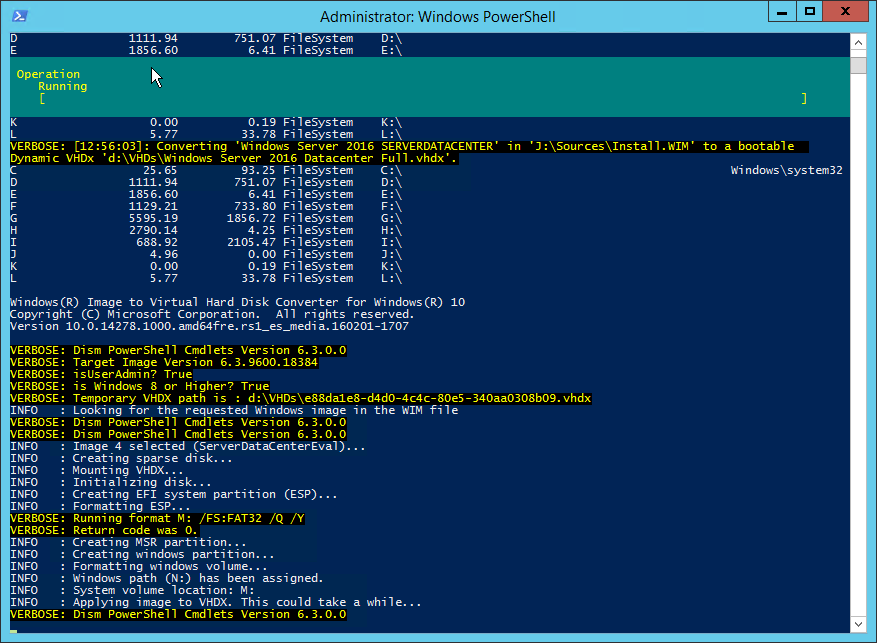
So sit back and grab a tea or coffee (or beer), because this will take a little while.
Note: The individual virtual machines are configured using PowerShell DSC after they are first started up. This means that it might actually take some time for things like domain joins and other post configuration tasks to complete. So if you find a Lab VM hasn’t yet joined the domain, it is most likely that the DSC configuration is still being applied.
Once you’ve built the Lab, you can log into the VMs like any other Hyper-V VM. Just double click the Virtual Machine and enter your login details: 
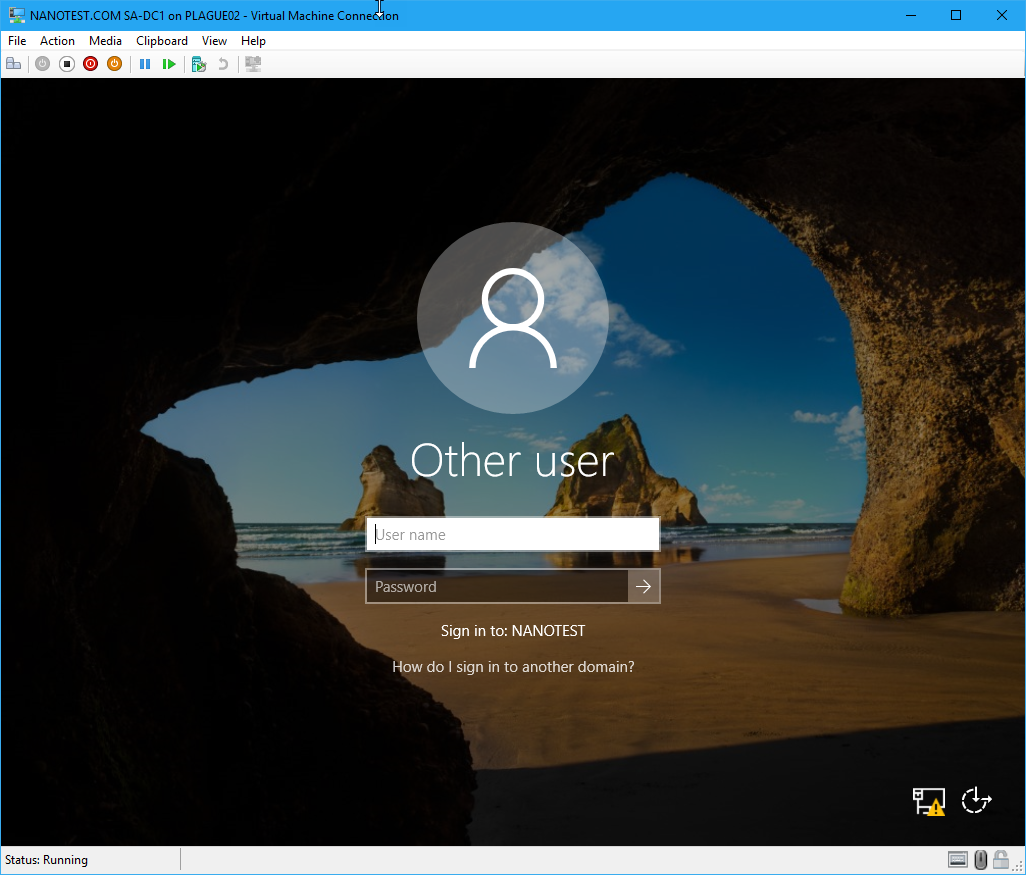
For the sample Lab the Domain Administrator account password is configured as P@ssword!1. This is set in the Lab Sample configuration and you can change it if you like.
Note: Nano Server is not designed to have an interactive GUI. You interact with Nano Server via PowerShell Remoting. You’ll want to have a basic knowledge of PowerShell and PowerShell Remoting before attempting to administer Nano Servers**.**
Once the Lab has been completely built, you can shut it down with the Stop-Lab command. You need to pass the path to the Lab Configuration file to shut it down:
The Virtual Machines in the Lab will be shut down in an order defined in the Lab Configuration file. This will ensure that the VMs are shut down in the correct order (e.g. shut down the domain controllers last).
If you need to start up a previously created Lab, use the Start-Lab command. You will again need to provide the path to the Lab Configuration file of the Lab you want to shut down:
The Virtual Machines in the Lab will be started up in an order defined in the Lab Configuration file. This will ensure that the VMs are started up in the correct order.
If you want to completely remove a Lab, use the Uninstall-Lab command. You will again need to provide the path to the Lab Configuration file of the Lab you want to unisntall:
Note: You will be asked to confirm the removals.
This article has hopefully given you a basic understanding of how to use LabBuilder to stand up a Hyper-V Lab in relatively short order and without a lot of commands and clicks. This project is still in Beta and so there may be bugs as well as some incomplete features. If you want to raise an issue with this project (or even submit a PR), head on over to the GitHub repository.