Creating Professional DSC Resources - Part 4
The purpose of this series of articles is to try and document a few of the lessons I learned while releasing new DSC resources as well as contributing to the existing Microsoft Community DSC resources. These articles are not intended to tell you how to write DSC resources from a programming perspective, but to give you some ideas on what might be expected of a DSC resource you’re releasing to the public. For example, unit and integration tests (don’t worry if you aren’t familiar with those terms).
These articles are also not intended to tell you what you must do to release your resource, but more document what will help your resource be easier to use and extend by other people. Some of these these things are obvious for people who have come from the development community, but may be quite new to operations people.
If you missed any previous articles you can find them here:
- Creating Professional DSC Resources – Part 1
- Creating Professional DSC Resources - Part 2
- Creating Professional DSC Resources - Part 3
Automated testing is something that is familiar to most developers, but for operations people it is usually a new concept. However, it is one of the most important things you can add to your DSC Resources - and most DSC resource projects won’t even accept your code contributions if they don’t contain automated tests.
So, what are automated tests? Well, they are just PowerShell scripts that you create and run that will check your DSC Resource is working correctly. Usually automated tests are run on your DSC Resources every time you commit your code - and they’ll tell you if anything has gone wrong. I could spend the next day listing reasons why automated testing is extremely important, but that is not the purpose for this post.
PowerShell contains a great automated test framework called Pester that allows you to describe your tests using special PowerShell functions.
Important: If you aren’t familiar with Pester and automated testing, you should get familiar with it before reading any further. This series is a fantastic place to start. Even if you’re familiar with Pester it is a good read.
An example of a Pester test on a DSC Resource:
The above test is a unit test of the xFirewall resource in the xNetworking module. the Don’t worry if you don’t completely understand this yet, that is the purpose of this article - although you should understand the basic structure of the Pester test - if you don’t, you’ll definitely want to go and review this series.
There are two types of automated tests you should create for your DSC Resources:
- Unit Tests - these test that each function in your DSC Resource works correctly in isolation. This means that if you call the function with a set of parameters you get expected output.
- Integration Tests - these tests ensure that your DSC Resource works in a real environment - e.g. work correctly when they are actually integrated into a DSC Configuration file.
For every DSC Resource in your DSC Resource Module you should ensure that there is one unit test file and one integration test file (although usually for integration tests a support file is also needed, but we’ll cover this later).
You should place all tests inside a Tests folder in the root of your DSC Module folder:
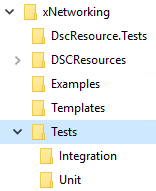
Unit tests should be placed in a Unit folder within Tests and … I’m sure you get where I’m going here.
Unit tests are a good place to start when creating automated tests for your DSC Resources because they’re u sually quite straight forward. Each DSC Resource in your DSC Module should contain it’s own unit test file. For example, here are the unit tests that are included with the xNetworking DSC Resource module:

A note about code coverage: A unit test script will contain lots of individual tests. The purpose of each individual unit test is usually to test a single path through a function that the computer might take when running that function. The goal therefore is to add as many tests as needed to make sure each code path is covered. This is called code coverage. The goal is to have 100% code coverage for your DSC Resource.
In these unit tests I am using a DSC Resource for creating iSCSI Virtual Disks to illustrate the process. You don’t need to know anything about iSCSI Virtual Disks to understand these articles or resources, but if you’re interested to know the cmdlets I’m using for these, see this page. I’m using the *_iSCSIVirtualDisk cmdlets in this DSC Resource.
You could just go ahead and create a new unit from scratch, but there is a much easier way. There is a unit test template file that you can use to create new unit tests. You need to copy the unit test template file and rename it to match your DSC Resource.
The easiest way to do this is to clone the repository containing the test template files and copy the unit_template.ps1 file to your Tests/Unit folder:

You’ll now have a new unit test file that you can open in your PowerShell editor of choice:
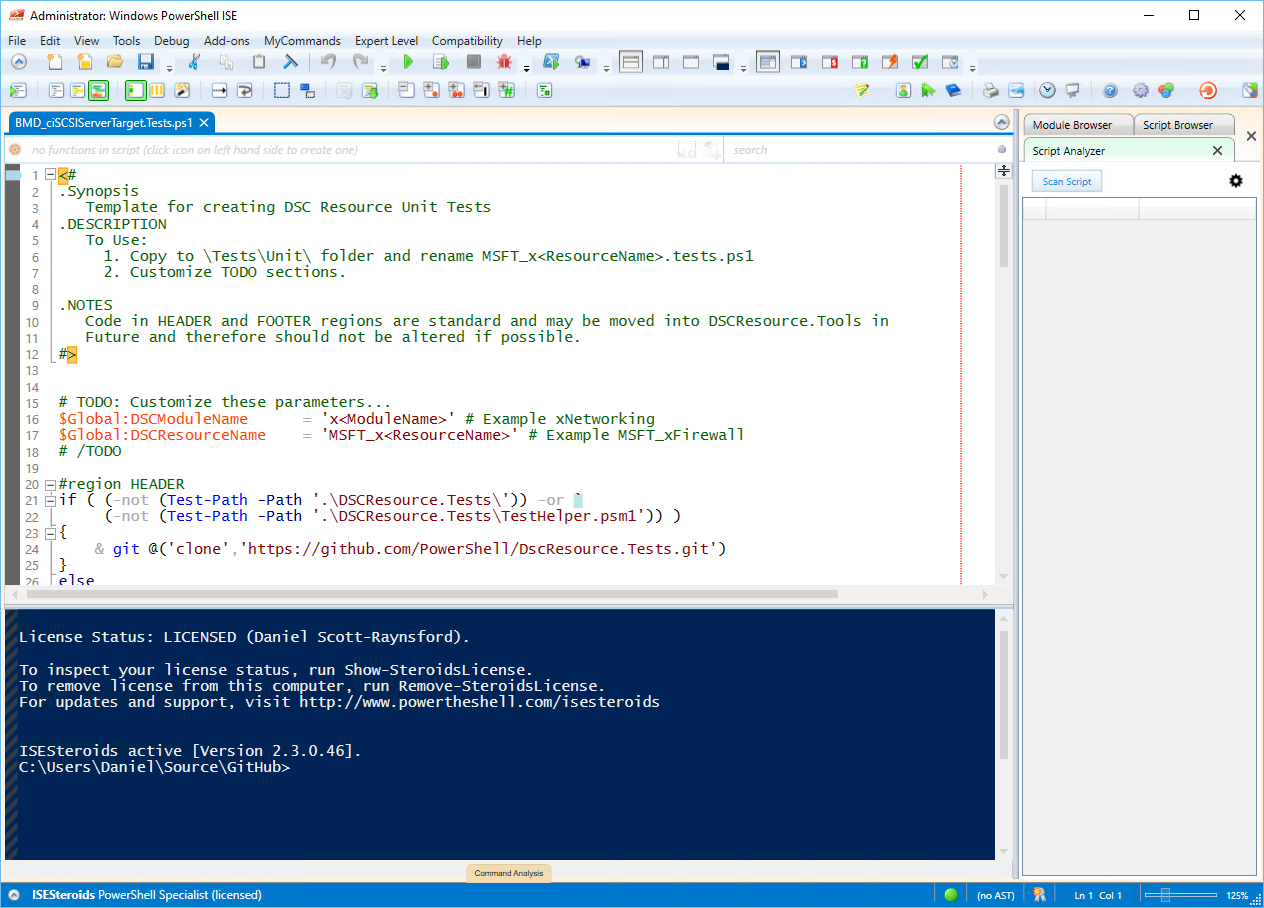
Next, customize the TODO area in the header with the your DSC Resource Name and DSC Module Name:

Feel free to remove the TODO comments if you want (I always do).
Now, onto the job of actually adding our Pester tests. You’ll want to locate the Pester Tests region:
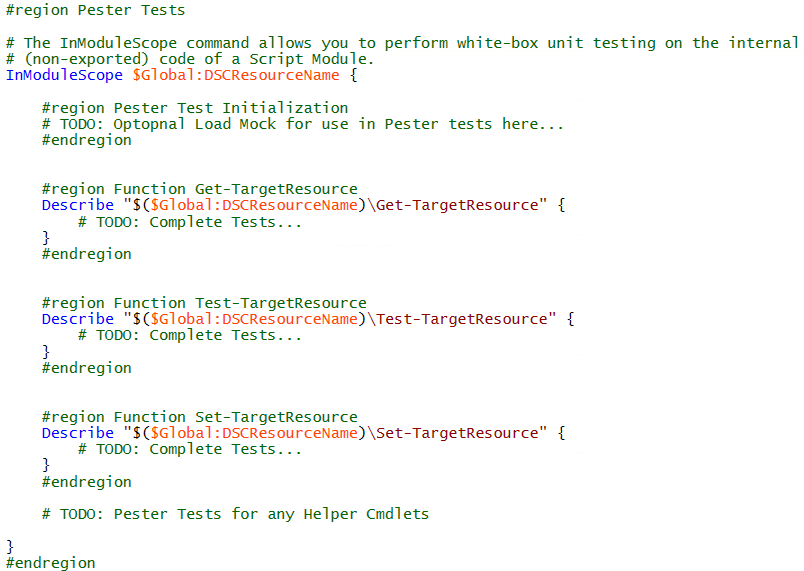
This is usually the only area of code in this file you need edit. There are several areas you need to customize here:
- Pester Test Initialization - this is where you would define any variables or objects that you might use for testing.
- Function Get-TargetResource - this would contain the Pester Tests to test the Get-TargetResource function.
- Function Test-TargetResource - this would contain the Pester Tests to test the Test-TargetResource function.
- Function Set-TargetResource - this would contain the Pester Tests to test the Set-TargetResource function.
- Pester Tests for any Helper Cmdlets - you would add Describe blocks for any additional functions you have defined in your resource to ensure those functions are tested.
Once there sections are completed for a DSC Resource the tests can be invoked using the Invoke-Pester command.
But first I’ll provide more detail on what you should add into each section.
The purpose of this section is to initialize any variables or objects that you’re going to use for testing.
For example, if you were testing a resource that was for creating an iSCSI Virtual Disk you might define the parameters of the iSCSI Virtual Disk that you’re going to use for testing:
The $TestVirtualDisk object is used to @splat onto the Set-TargetResource and Test-TargetResource functions and for comparison. It saves us lots of typing and therefore potential mistakes.
The $MockVirtualDisk object is used as output to the Mocks that get defined on the Get-iSCSIVirtualDisk cmdlet when we want to simulate the scenario where the iSCSI Virtual Disk already exists.
You don’t of course have to do this, but you’ll find that having some objects defined up front that you can use as test objects will make your code smaller and easier to understand as well as making the tests run faster.
This area will contain the actual Pester tests that test the Get-TargetResource function. Usually there are only a small number of tests you can perform in this function:
- Does it work when the resource being configured does not exist?
- Does it work and return the expected parameters when the resource being configured does exist?
For example:
In the above code we have two Context blocks - one for each of our scenarios above.
In this scenario we Mock the Get-iSCSIVirtualDisk cmdlet to return nothing. This is the behavior we’d expect if the resource being configured didn’t exist.
We can now check the object returned is what is expected and that the Get-iSCSIVirtualDisk was called the expected number of times - in this case once.
In this scenario we Mock the Get-iSCSIVirtualDisk cmdlet to return the object we defined in the Pester Test Initialization section. This is the behavior we’d expect if the resource being configured does exist.
We can therefore check the object returned is what is expected and all the returned object properties match and that the Get-iSCSIVirtualDisk was called the expected number of times - again this is once.
I wanted to put all the unit test info in a single part of this series, but as you can see it is getting quite long. I’ll complete the rest of the information on unit tests tomorrow.
So in the next article, I’ll cover the unit tests for Set-TargetResource and Get-TargetResource as well as unit testing any additional functions. Thanks again for reading and I hope it is useful.
Further parts in this series: