Creating Professional DSC Resources - Part 2
The purpose of this series of articles is to try and document a few of the lessons I learned while releasing new DSC resources as well as contributing to the existing Microsoft Community DSC resources. These articles are not intended to tell you how to write DSC resources from a programming perspective, but to give you some ideas on what might be expected of a DSC resource you’re releasing to the public. For example, unit and integration tests (don’t worry if you aren’t familiar with those terms).
These articles are also not intended to tell you what you must do to release your resource, but more document what will help your resource be easier to use and extend by other people. Some of these these things are obvious for people who have come from the development community, but may be quite new to operations people.
If you missed any previous articles you can find them here:
So, you have an idea or need for a set of super new DSC Resources. Before you write a single line of code you should first go and take a look at the documentation provided by the DSC Community. These guys (many of them from Microsoft) have been doing this stuff for a while and they’ve come up with a set of best practices and instructions on how to get started.
The above GitHub repository should be your first port of call and for DSC creation and it is worth keeping an eye on this repository by watching it:

This will cause you to be notified whenever any changes to this repository are made (which isn’t that often). So if the best practices are updated you’ll be kept in the loop!
This repository also contains some template files you can use to create a new DSC Resource module.
Sure, there is no reason why you can’t just jump straight in and knock out a PSD1 file and some PSM1/MOF files and be done with it. But creating a resource that other people can easily use, usually requires a few other files.
First, you need to decide on the name for the DSC Resource module folder. This is usually simple enough, but if you think your module may contain more than one resource it is worth naming it with a more generic name. For example, if you were creating a DSC Resource module that will contain resources for configuring iSCSI Targets and iSCSI Initiators you might name your folder ciSCSI.
Tip: Your resource folder should begin with a lower case c. This indicates it is a Community DSC resource. This is not a requirement, but it tells people that the resource was created by the community (in this case you). DSC Resource modules starting with an x indicate that this is a Microsoft Community DSC resource and maintained by the PowerShell team as well as the community, but are not built in to DSC.
Once you’ve created the folder to store your new DSC Resource module, you should make a copy of all the files in the GitHub repository folder found here to the root of your new DSC Resource folder:

The easiest way to get a copy of these files is to use Git to clone the DSCResource repository on your computer and then copy the files from the DSCResource.Template folder to your new DSC module folder:
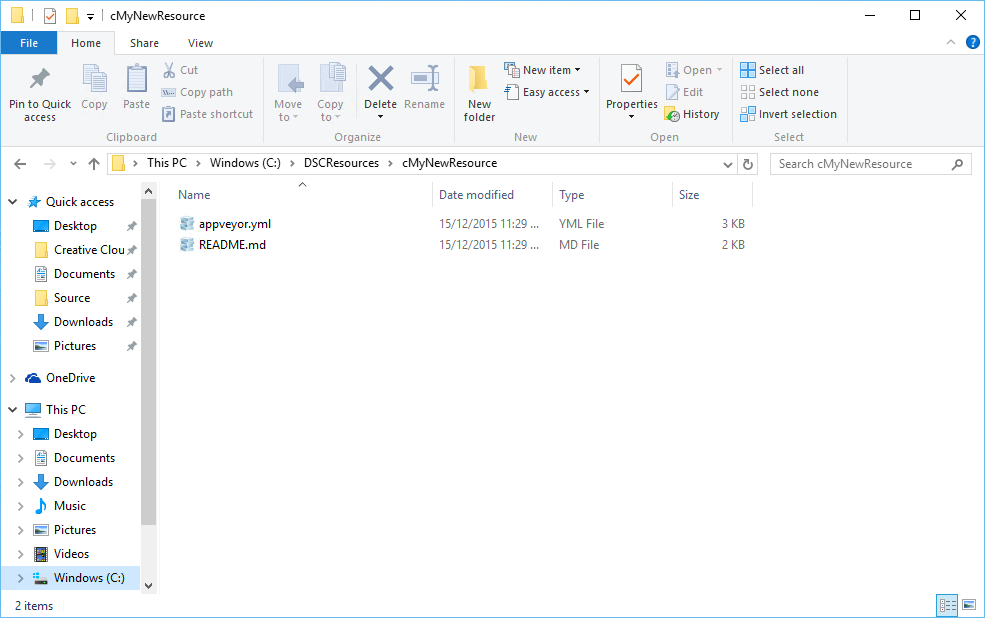
At the time of writing this the DSCResource.Template folder only contains two files:
- Readme.md - tells people how to use your DSC Resource as well as containing usage examples and Version information. You should fill this in as soon as possible and keep it up-to-date everytime you change your DSC Resource.
- AppVeyor.yml - this is a file that configures the AppVeyor Continuous Integration (CI) for your DSC Resource Module. I will cover AppVeyor CI later in the series. At the moment don’t worry about this file, just copy it to your module folder and leave it alone.
The readme.md file (like most other files with an .md file extension) is text file in the Markdown format. Because this file is being made available up on GitHub you can use GitHub Flavored Markdown. Markdown is really easy to create straight in your editor of choice and you’ll find it in use all over GitHub, so it is a good idea to get somewhat familiar with it (it should only take you about 2 minutes to get a handle on it).
If you want an example of how your Readme.md file might be constructed, have a look at this example. Of course you are completely free to format it any way you like, but keeping to a standard makes it easy for users to know what they can expect.
As I’m trying to keep these parts short I’ll break for today and continue tomorrow. In the next part I intend to cover code guidelines and examples, with unit and integration testing to follow. I hope you have found this interesting!
Further parts in this series:
