
Install a VMWare ESXi 6.0 Hypervisor in a Hyper-V VM
Update 19th February 2018:
This article has had a lot more attention than I ever expected! This has brought to light several issues with the process as well as changes made to Hyper-V and ESXi that break the process. You could wade through all 256 comments and assemble the corrections yourself, but user @Gambit has helpfully done this for me! So I’ve included the summary here:
- @Tom Watson: Adding a line to
/etc/vmware/configwithvmx.allowNested = "TRUE". Since all VMs will be running nested (whole point of article), this is a must if you want them to start! The alternative is adding this line to every VMX file for each guest. Tom’s solution was much more elegant. - @burnett437: Configure ESXi Management vSwitch to “accept” “promiscuous mode”. Apparently, this was a known issue even in nested ESXi 5.5. While the host network will operate for a while without a problem, the “promiscuous mode” policy will eventually be tripped, and you won’t be able to talk to the host at random times. Now I think this has to do with the nature of nested virtual switches (a VMWare vSwitch inside of a Hyper-V Virtual Switch). When this happens, I found you could “down/up” the management
vnicXto get it back, but just set the setting to not worry about it. - @me: Network threat detection doesn’t like nested virtual switches either. My Symantec Endpoint Client would occasionally block traffic coming from my local NIC (vSphere Client/vSphere Converter) to this nested Host (Windows Firewall did NOT seem to care), but SEP occasionally tripped because of all “suspicious” addressing to the nested host.
- @me: Use vSphere converter for guest images coming from other VMWare products….duh. ESXi doesn’t like split VHDKs; the guest won’t boot. This is a beginner mistake, but this article is for Hyper-V admins that may not know the subtle nuances between VMWare products.
- @RichMD: I like the idea of hardware pass-through on the NIC. I may tinker with this because it may resolve several issues, not just the ESXi v6.5 NIC blacklist issue. Theoretically, passing the physical NIC directly to the nested ESXi Host could/should resolve the “promiscuous mode,” “Network Threat Protection,” and even the “Half Duplex Legacy Adapter Requirement” (very slow network performance) problems.
The Original Article Starts Here
Recently I’ve been playing around with the new Hyper-V Nested Virtualization feature within Windows 10 (build 10565 and greater) and Windows Server 2016. It is pretty cool to be able to create virtualized lab environments containing Hyper-V clusters. But what if we want a lab that contains VMWare ESXi Hypervisors running on a Hyper-V host? I couldn’t find the process documented anywhere and couldn’t even confirm if it should be possible. But after asking a lot of annoying questions—thanks Adam Burns—Googling, and hair-pulling, I managed to get it going:
So this seems like a good topic for a blog post.
What You’ll Need
You are going to need a few things to get this working:
- A Hyper-V host running on Windows 10 (build 10565 or greater) or Windows Server 2016 TP4.
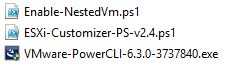
- Enable-NestedVM.ps1 - A PowerShell script for enabling Nested Virtualization in a Hyper-V VM. Click here to get the file from the Microsoft team on GitHub.
- A VMWare account - just sign up for one here if you don’t already have one.
- VMWare PowerShell CLI installed - I used the 6.3 release 1 that I downloaded from here.
- ESXi-Customizer-PS.ps1 - A PowerShell script for injecting network drivers into an ESXi 5.x/6.x ISO. I downloaded it from here.
I suggest you download all of the above items to a working folder—I called mine D:\ESX-In-Hyper-V, so these instructions will reflect that, but you can call your folder whatever you like.
You should end up with a folder containing these files:
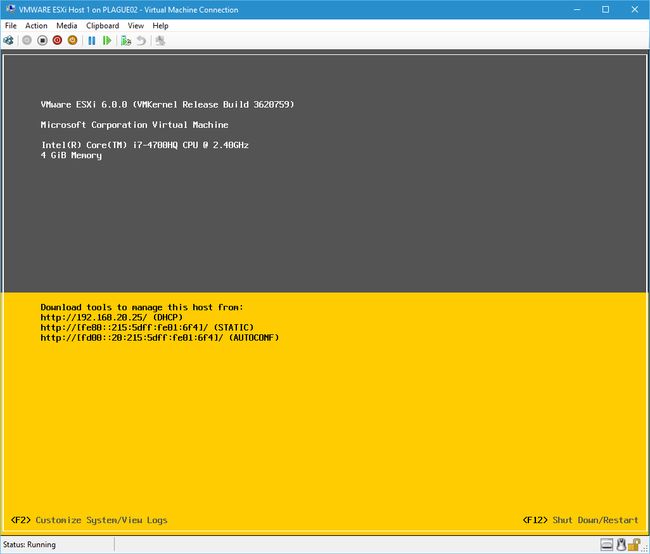
And before you ask: No, you don’t need a VMWare ESXi 6.0 ISO—this will get downloaded and produced for us.
The Process
Part 1 - Prepare an ESXi 6.0 ISO with Network Drivers
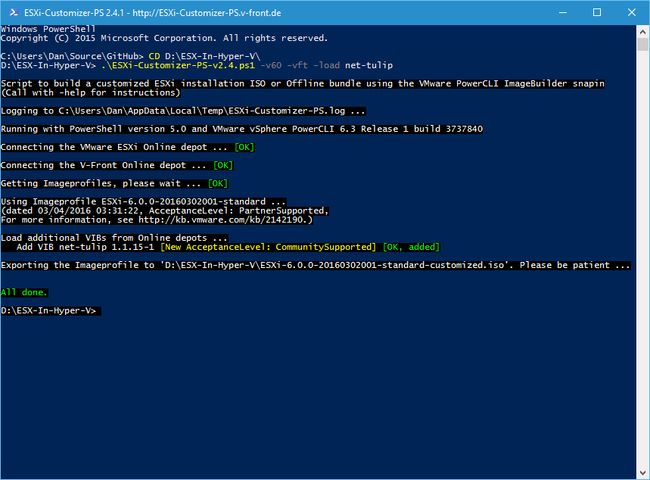
The biggest problem I ran into when trying to install ESXi onto Hyper-V was that the ESXi kernel doesn’t come with drivers for the Microsoft Virtual Network Adapter or the Microsoft Legacy Network Adapter (emulates a DECchip 21140). So you’ll need to inject these drivers into the VMWare ESXi 6.0 ISO. Luckily, there is a script available and the appropriate drivers DECchip 21140 (called “net-tulip” for some reason) that makes this process a breeze:
Install VMWare PowerCLI.
Open a PowerShell console.
Enter the following commands:
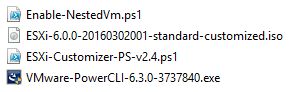
CD D:\ESX-In-Hyper-V\
.\ESXi-Customizer-PS-v2.4.ps1 -v60 -vft -load net-tulip
After a few minutes, the VMWare ESXi 6.0 ISO will be downloaded, and the “net-tulip” drivers merged with it:
The ISO will now be available in the D:\ESX-In-Hyper-V folder:
Part 2 - Create the Hyper-V VM
- In Hyper-V Manager, create a new Virtual Machine:
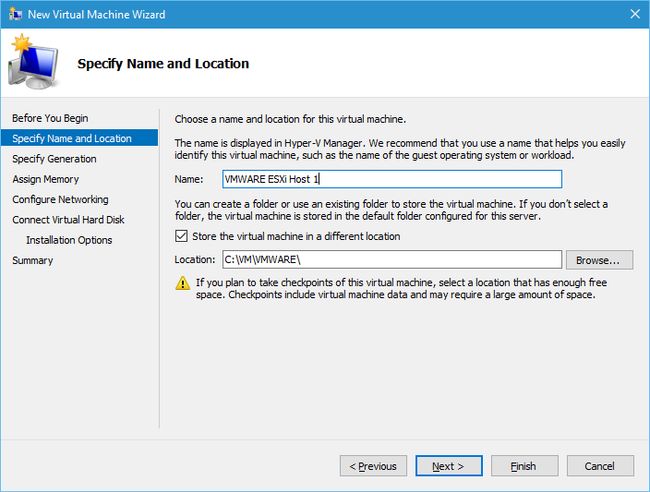
- Click Next.
- Select Generation 1 and click Next.
- Set the Startup Memory to at least 4096MB.
- Uncheck Use Dynamic Memory for this Virtual Machine:
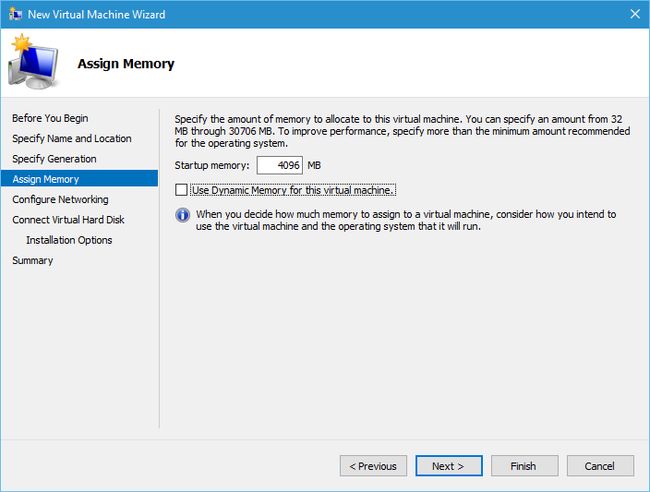
- Click Next.
- Don’t bother to Configure Networking on the next step—just click Next.
- Select Create a new virtual hard disk and set the Size to 10GB (this is just going to be the boot disk for the ESXi Hypervisor):
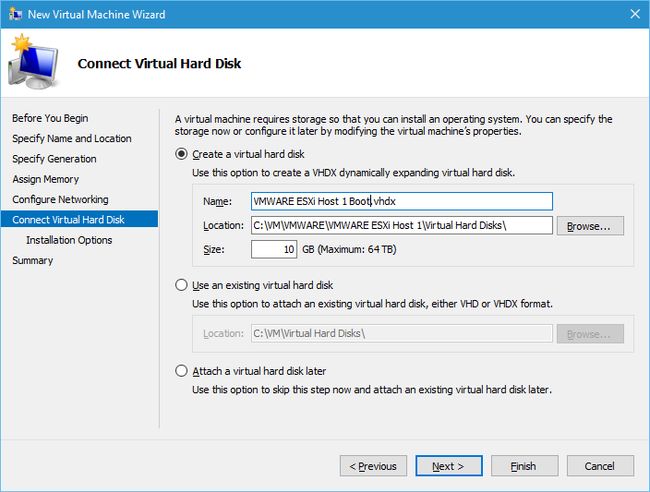
- Click Next.
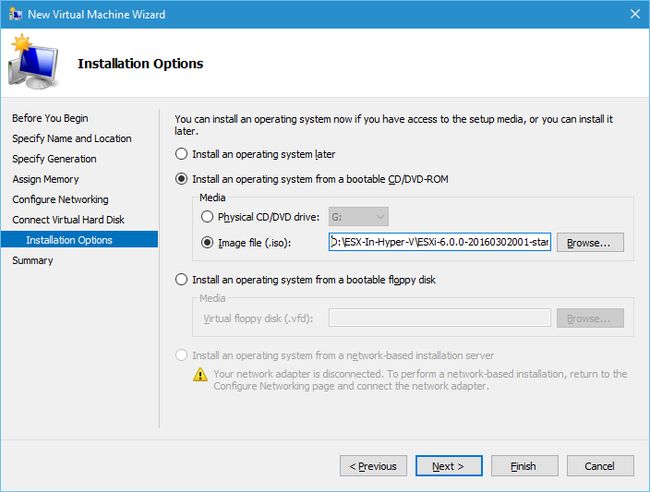
- Select Install an operating system from a bootable CD/DVD-ROM.
- Select Image file (.iso) and browse to the ISO created in Part 1:
- Click Next, then click Finish to create the Virtual Machine:

- Right-click the new Virtual Machine and select Settings.
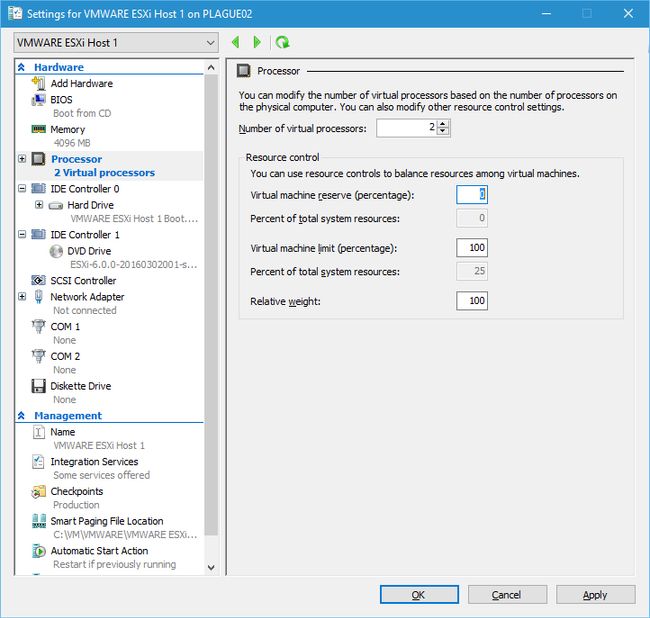
- Select the Processor node and increase the Number of Virtual Processors to at least 2:
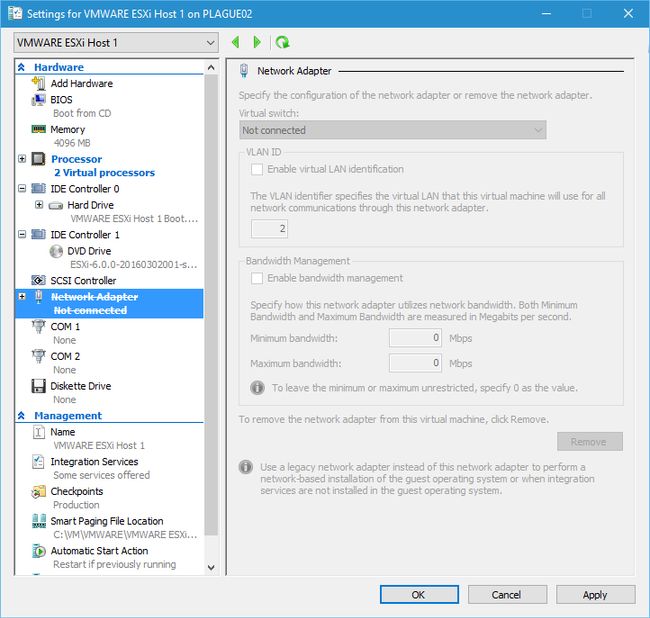
- Select the existing Network Adapter node and click Remove:
- Select the Add Hardware node and select Legacy Network Adapter:
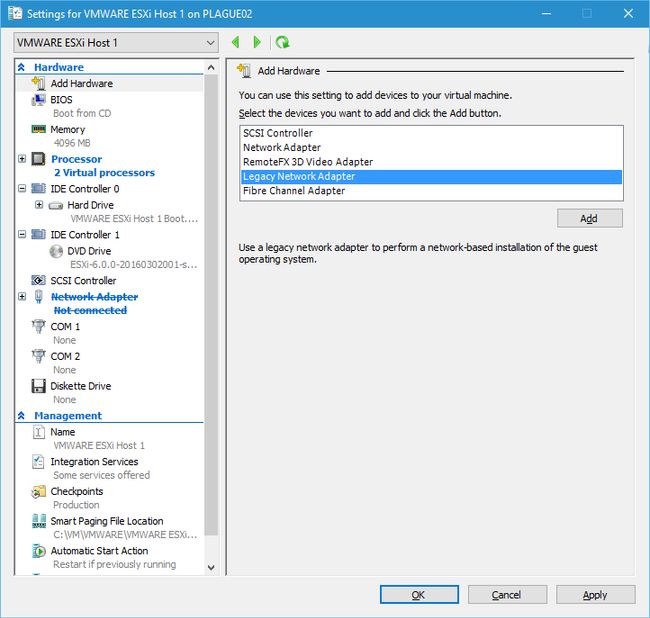
- Click Add:

- Select a Virtual Switch to connect the ESXi Host to.
- Click OK.
The rest of the process involves enabling nested virtualization, booting the ESXi VM, and configuring the ESXi boot options. If you’d like me to continue with those steps, let me know!